
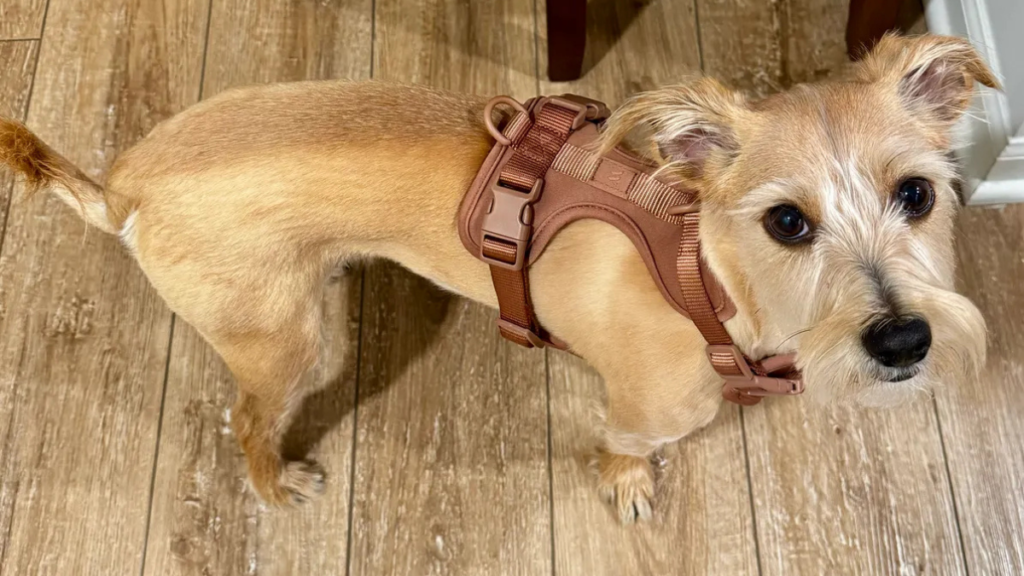
A no-pull harness only works when it fits correctly. Put it on wrong — too loose, twisted, or clipped at the wrong point — and it does almost nothing. Put it on right and it gives you a completely different walking experience within a single session.
The good news is that once you know the steps, the whole process takes under thirty seconds. This guide walks through exactly how to fit and put on a no-pull dog harness, how to check that it is sitting correctly, and what to adjust if something feels off.
If you have not yet found the right size for your dog, start with our dog harness size guide — the fit tips below assume you are already working with the correct size.
Before You Start: Know Your Harness
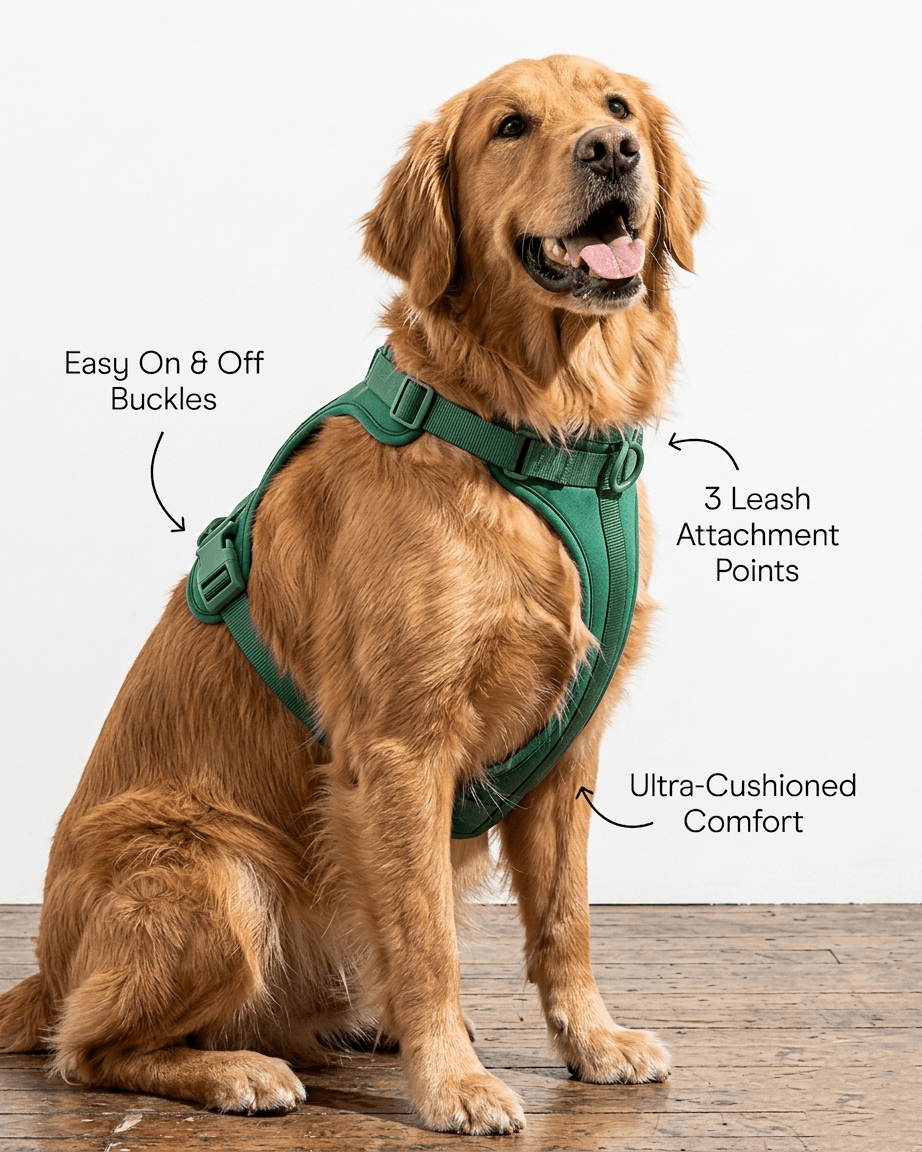
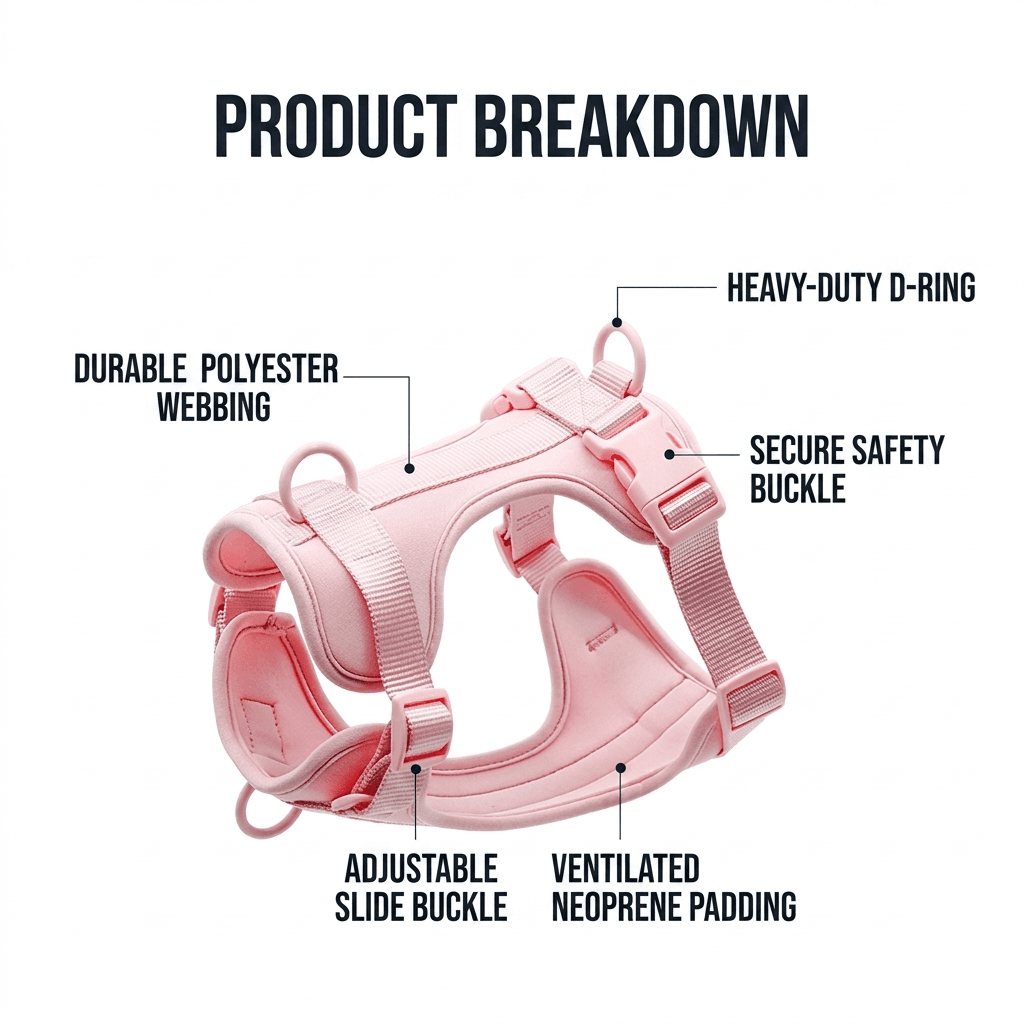
A no-pull harness has more components than a standard collar, so it helps to know what you are working with before you try to put it on. The MoonianPet No-Pull Harness has four key parts:
Neck strap
The loop that sits around the base of the neck. It should sit snugly without pressing into the throat. This strap has a tri-glide adjustment buckle so you can fine-tune the fit.
Chest strap
The horizontal strap that crosses the chest between the front legs. This is where most of the fit adjustment happens — too loose and the harness rotates, too tight and it restricts movement.
Front D-ring (no-pull attachment)
Located on the chest strap. When the leash is clipped here, forward pulling momentum is redirected to the side — which naturally discourages pulling without any choking or discomfort.
Back D-ring (standard walk attachment)
Located between the shoulder blades. Standard attachment point for calm walkers or for dogs that have already learned to walk well on a leash. Gives more natural movement than the front clip.
How to Put On a No-Pull Dog Harness: 4 Steps
Have your dog stand in a relaxed position. Sitting compresses the chest and makes it harder to judge fit — standing gives you an accurate picture of how the harness will feel during a walk.
Loosen all straps before putting it on
Before the first fitting, loosen the neck strap and chest strap fully. This makes it much easier to slip the harness over your dog’s head and position it correctly before tightening. Trying to put on a fully tightened harness on a wriggly dog is unnecessary frustration.
Slip the neck loop over the head
Hold the harness so the front D-ring faces forward and the back D-ring faces up. Slip the neck strap over your dog’s head so it sits at the base of the neck — not up near the ears, not down on the shoulders. The chest strap should hang loosely across the front of the chest at this point.
Clip the quick-release buckle under the belly
Guide your dog’s front legs through the harness openings — or guide the harness around the legs, whichever is easier for your dog. Then snap the quick-release buckle closed under the belly. You should hear a clear click. Give it a gentle tug to confirm it is fully locked before moving to the next step.
Adjust all three straps until snug
Work through the neck strap, chest strap, and belly strap in turn, tightening each until you can fit two fingers underneath but not three. The front D-ring should sit centered on the chest — if it slides to one side, the chest strap needs tightening. The back D-ring should sit flat between the shoulder blades.

How to Check the Fit Is Correct
Once the harness is on and adjusted, run through this quick check before clipping the leash:
✅ Two fingers fit under every strap
Neck strap, chest strap, belly strap — all three should pass the two-finger test. If any strap is tighter than this, loosen it slightly. If you can fit three fingers or more, tighten it.
✅ Front D-ring sits centered on the chest
Look at the front of the harness. The D-ring should be sitting flat and centered — not drifted to the left or right. If it has shifted, the chest strap needs tightening evenly on both sides.
✅ Back D-ring sits flat between the shoulder blades
Run your hand along your dog’s back. The back D-ring should be lying flat, not being pulled forward toward the neck or back toward the tail. If it is off-center, recheck the neck strap adjustment.
✅ The harness does not rotate when your dog moves
Ask your dog to walk a few steps and turn around. A correctly fitted harness stays in place. If it rotates to one side or the chest strap slides down the legs, it is too loose — tighten the chest strap and recheck.
❌ No signs of rubbing or restriction
Watch how your dog moves. A well-fitted harness should be invisible in terms of movement — your dog should walk, trot, and turn exactly as they do without it. Any hitching, shortening of stride, or rubbing under the front legs means an adjustment is needed.
Front Clip or Back Clip — Which Should You Use?
Both attachment points work with any standard leash. The choice depends on how your dog walks:
For Dogs That Pull
Front Clip (chest D-ring)
When your dog pulls forward, the front clip redirects them to the side rather than letting them build momentum. Most owners with strong pullers notice a difference within the first walk. Start here if your dog currently drags you down the street.
For Calm Walkers
Back Clip (back D-ring)
Standard attachment for dogs that already walk well on a leash. Gives more natural movement and is more comfortable for extended walks. Also useful once a former puller has learned to walk calmly — you can transition from front to back clip as their behavior improves.

Common Mistakes When Putting On a No-Pull Harness
Putting it on a sitting dog
A sitting dog has a compressed chest. What feels snug when sitting will be too tight when standing and moving. Always fit on a standing dog.
Leaving the chest strap too loose
A loose chest strap is the most common cause of harness rotation and front D-ring drift. If the harness keeps twisting to one side on the walk, the chest strap is the first thing to tighten.
Clipping the leash to both D-rings at once
Using a double-ended leash clipped to both D-rings simultaneously is a training technique that requires specific handling. For standard walking, clip to one ring only — front for pullers, back for calm walkers.
Not re-checking fit after the first few walks
Harness straps can settle slightly after the first one or two uses as the material beds in. Re-check the two-finger rule after the first three walks and make any small adjustments needed. After that, a monthly check is sufficient for adult dogs.
The No-Pull Harness That Fits Right First Time
The MoonianPet No-Pull Dog Harness is built with a 3-point tri-glide adjustment system — neck, chest, and belly — so you can dial in a precise fit on any body shape. The breathable neoprene padding sits softly against the chest without rubbing, and the escape-proof quick-release buckle snaps on in seconds even with a wriggly dog. Available in 5 sizes from XS to XL and 11 colors.
Pair it with the MoonianPet Waterproof Leash for a fully matching setup, or save $14 with the Harness & Leash Set.
Not sure which size? Our dog harness size guide walks through measuring neck and chest girth in under two minutes.
Frequently Asked Questions
How tight should a no-pull harness be?
The two-finger rule applies to every strap: snug enough that you can slide two fingers underneath, but not three. Too loose and the harness rotates and loses its no-pull effectiveness. Too tight and it restricts movement and can cause chafing under the front legs.
My dog keeps backing out of the harness. What am I doing wrong?
Backing out usually means the harness is too loose — particularly the chest strap. Tighten all three adjustment points and recheck with the two-finger rule. The MoonianPet harness has an escape-proof double-layer buckle design that prevents backing out when fitted correctly. If your dog is still escaping after tightening, check that you have the right size — a harness that is too large cannot be adjusted snug enough to be secure.
Does a no-pull harness actually stop pulling?
A front-clip no-pull harness reduces pulling significantly for most dogs within the first few walks. The front clip redirects forward momentum to the side, which interrupts the pulling motion and makes sustained pulling physically awkward. It does not replace training — but it gives you immediate mechanical assistance while training is ongoing.
Can I leave the harness on all day?
The neoprene padding on the MoonianPet harness is designed for extended wear and will not cause irritation with all-day use. That said, we recommend removing it during crate rest or unsupervised sleep as a general safety practice — not because of any harness-specific concern, but because any attached equipment can become a snagging hazard when unsupervised.
Should I use a collar and harness at the same time?
Yes — many owners use a collar for ID tags and the harness for leash attachment. This is safe and practical. Just make sure the collar sits at the base of the neck without pressing into the harness neck strap. For a full breakdown of when to use each, see our collar vs harness guide.
How do I know if my dog needs a different size?
If you cannot get the harness snug enough even at maximum tightening, it is too large — size down. If you cannot fit two fingers under any strap even at the loosest adjustment, it is too small — size up. Our harness size guide has the full measurement chart to help you find the right fit before ordering.
Deciding between a collar and a harness for your dog? Our collar vs harness guide covers the full comparison. Or if you are still finding the right size, start with our dog harness size guide — it walks through measuring in under two minutes.
About the Author
Wenyue
Wenyue is the founder of MoonianPet and writes about dog collars, harnesses, waterproof pet gear, and everyday dog care.
Growing up with dogs inspired her lifelong interest in pet care and practical dog gear. Through MoonianPet, she researches dog collars, harnesses, waterproof materials, and everyday solutions that help active dogs stay comfortable during daily adventures.
Fit and UseCollar vs HarnessWhen to use each and what changes for pullers and puppies.
CollarsHow to Measure Your Dog for a CollarGet the fit right first time. Includes our full size chart.
MaterialsBest Dog Collar MaterialNylon vs leather vs coated webbing — which actually lasts?
MaterialsIs Nylon Safe for Dogs?Nylon is popular but it has real downsides for active dogs.
CollarsDog Collar Colour GuideHow to choose the right shade for your dog.
MaterialsBioThane vs Leather Dog CollarA straight comparison between two premium collar materials.
MaterialsWhat Are Dog Collars Made Of?Every material explained — from nylon to BioThane.